Quantcast
Channel: Photoshop – SLR Lounge
Viewing all 349 articles
Browse latest View live

How To Use Blend Modes To Totally Revamp Your Photography | Brilliant Work From Jimmy McIntyre

$
0
0

He says, as a closing statement, that he hopes this tutorial has inspired you to explore blend modes more. He, is Jimmy McIntyre, and he needn’t hope, because it has, and I’ll bet for you it will. In near-as-makes-no-difference 7 minutes, McIntyre illustrates how incredibly powerful Photoshop blend modes are, and how fast they can be manipulated for effect.

jimmy-mcintyre-photoshop-tutorial-photography-landscape-stars-portrait-slrlounge-4

McIntyre’s been published globally, and for prestigious names such as the BBC, and named one of the top photographers to follow on 500px. He’s also an instructor who’s taught on numerous continents, in more than one language, and offers post processing courses you will likely be interested in after you see what he’s offered up here.

Living a nomadic lifestyle, with around 30kg of possessions, McIntyre seems somewhat of a bohemian gypsy. Maybe less Gypsy, more a stoic; he says he lives and breathes photography, and the flow-state ease with which he delivers his material suggests that is true.

jimmy-mcintyre-photoshop-tutorial-photography-landscape-stars-portrait-slrlounge-1

We’ve all used blend modes to some extent during our time in Photoshop, but if you’re like me and tend to photograph within the same genre most of the time (for me it’s people and aviation), you may fall into using the same blend modes over and over. Furthermore, you may only use those blend modes in very specific Photoshop processes, which doesn’t really give you a chance to see what they can do.

[REWIND: Focus Stacking and Blending in Adobe Bridge and Photoshop: A How To Guide]

jimmy-mcintyre-photoshop-tutorial-photography-landscape-stars-portrait-slrlounge-5

Here, Jimmy takes you through everything from the ‘Lighten’ blend mode, through soft-light, Overlay, Darken, and Luminosity. Each of these, as demonstrated by Jimmy, will likely have immediate practical value to your work, and will just as likely upgrade the quality of your images, but also the pace of your workflow. I come across an absolute torrent of Photoshop tutorials, and many are great and ultra specific, but few are this revelatory in such a short span of time, with such a broad span of application. Highly recommend you spend the few minutes with it.

And if this is anything to go by, do take the time to check our what Jimmy has to offer on his site, as it’s sure to also be worth your time, and impress. You can find him on his site for workshops and tutorials here, and on 500px.


Adobe Files Suit Against Forever 21 For Piracy – Autodesk & Corel Become Co-Plaintiffs

$
0
0

adobe-photoshop-piracy-corel-aitodesk-forever21-sucks-photography-slrlounge-2

What does it mean when a multi-billion dollar company allegedly ignores legal boundaries of copyright of a software company and widely uses and distributes pirated software within their business? Well a lawsuit, for one, but more importantly what does the dismissal say about the photographic/creative industry on a whole? More on that later.

Thus far, Adobe Systems Inc, has accused the retail monster that is Forever 21 of unlawful reproduction and distribution of certain Adobe software products, and filed suit. Interestingly, it seems Adobe has claimed that they even warned Forever 21 on the matter; a warning, it seems, Forever 21 would’ve done well to heed. The programs in question seem to be limited to Photoshop, Acrobat, and Illustrator, but the suit isn’t limited to only Adobe – Autodesk and Corel have become co-plaintiffs claiming that Forever 21:

  1. copied and reproduced certain of the Adobe Products, Autodesk Products, and Corel Products;
  2. and circumvented technological measures that effectively control access to the Adobe Products, Autodesk Products, and Corel Products (collectively, the ‘Access Control Technology’).

(See full documentation here)

The companies filing suit have filed for the court to issue an injunction for compensation to cover lost revenue, court costs, and of course all manners of additional damages. It also appears Adobe has significant documentation on the violations, though it seems unclear as to how. It’s also not a stretch to believe that the suit will go in favor of Adobe, especially given the scale of revenue generation by Forever 21 which was just shy of $4 billion USD in 2014.

adobe-photoshop-piracy-corel-aitodesk-forever21-sucks-photography-slrlounge-1

With a bankroll like that, you’d think a few thousand dollars, even ten or twenty would be like trifle – not even enough to go over the books should the balance sheet not balance. They’d be able to pay that, set a good example, and avoid a lawsuit and bad faith, and still do the Scrooge McDuck swim through their vast amount of coin.

Thoughts For Photography…

While I personally can’t see anyone defending Forever 21 other than those hired to do so – what may be more interesting than the suit is what their utter dismissal of copyright indicates about views towards the creative industry.

Undervalued, is the term that comes to mind. And irrelevant. It’s so frustrating that these massive companies view the creative and photographic world and its members as non-essential and inconsequential in today’s world. The New York Times just posted images to their front page that they plucked from Instagram, without permission; my images are being used by a camera retailer to sell their gear without my permission, yours too probably; and the list of these stories goes on so long it would make War & Peace look like a Haiku. So when a huge company does something like this, it just seems to re-enforce the idea that this field is there to take advantage of.

When did photography and its creative associations become so insignificant? How can this be combated? Feel free to share your thoughts in the comment section below.

Photography Actions and Presets Are The Devil! Or Are They? The Benefits of Using Them In Your Workflow

$
0
0

You occasionally see comments within the photographic community similar to the title of this article, “Actions and Presets are the Devil!” Well, perhaps not the devil, but you may have heard it said that they’re for amateurs or are the bane of creativity and that only those that don’t know what they’re doing use them. I disagree.

Actions and Presets can be bad if used in the wrong way (I’ll refer to them as AP’s from now on); for instance, as a crutch to mask a person’s lack of editing ability. The result of which can only be to hamper your progression and, in turn, creativity.  I would always advise someone to take the time to learn a program before either buying or creating actions. That way you know what everything does, why it’s being used and most importantly, what you want to tweak. 

[REWIND: POST PROCESSING: ADOBE LIGHTROOM PRESETS OR PHOTOSHOP ACTIONS?]

lightroom-presets-tutorial-101

Why I Use Actions and Presets

I do hours and hours of editing each week. That could be anything from spending hours on one photo in Photoshop to a matter of minutes per photo in Lightroom. AP’s are a huge part of my workflow. I cannot imagine finishing a family photo shoot, having 400-600 images, and going through all the sliders in Lightroom for every image. That sounds like madness to me!

Benefits to using AP’s

Speed – This is an obvious one, but worth mentioning. A well-crafted set of AP’s can really help you fly through your initial edit. Remember, you can always return to images at a later stage to apply those final little touches.

[RELATED: Check out our favorite Lightroom Recipes here]

Memory – This is a big one for me. My memory is appalling! Whenever I used to come across a good Lightroom or Photoshop technique, I’d create an Action or Preset. I still do. Some techniques take lots of steps and without actions, honestly, I would forget.

Encouraging Creativity – That’s right. I genuinely believe that if you have an excellent set of AP’s, it will actually encourage creativity. I find they allow me to flow a little better when I edit, less thinking about the steps and more about the final look.   

For me, those are the three main benefits and really they cannot be underestimated. I guarantee that if you went to any professional retoucher, they would tell you that they use AP’s to some extent. Why not? I have actions for everything; frequency separation, check layers, removing CA, dodging and burning, whitening teeth, enhancing eyes…I could go on and on. Here’s a screen grab of my PS set up. I have the actions in button mode and as you can see there are quite a few.

PS - small

Another minor, but still useful benefit is organization. If you’re anything like me, naming layers can seem a bit of a chore. My PS actions are named and even colour coded which really helps. Sometimes, I manually create layers and am still a little lazy, but having the majority named makes a big difference. Take a look at the image below. Those are all the layers I used on the image above of a friend of mine. Almost all of those layers were created, named and grouped using Actions.   

Layers

Wow, So I Can Just Use Actions and Presets As a Shortcut For Everything…

NO! Certainly there are lots of places where AP’s can be used, but some tasks just take time, there is no way around it. For example, yes I use an action to set up my frequency separation layers. However, the actual process of removing blemishes and smoothing the transitions between shadows and highlights takes time. I think this is another place where AP’s get a bad name. Some systems claim to do everything and unfortunately, that just can’t work. Those systems will hamper creativity, act as a crutch and ultimately ruin your images. It all comes back to knowing your programs prior to creating or purchasing AP’s.

Now we know that AP’s can be good let me also say that when you purchase systems they are by no means created equally. There are so many opportunities for us as photographers to throw our money down the drain and unfortunately, buying a poorly designed Preset or Action system is one of them.

I’ve accumulated and created all of my PS actions myself and if you go down this route, I cannot stress enough how important it is for you to firstly, record the actions correctly and secondly, have a logical system. If you ignore those two steps, then your actions will probably slow you down. There’s a great video from the guys over at Phlearn which takes you through the proper way to create actions.

I never recommend something I have not tried hence I cannot recommend any PS action systems for you to purchase. If you guys know of any great ones leave a comment below. I can however recommend a great system for Lightroom. I’ve used it for quite some time now, before writing on here, and must say it’s great. Obviously, I am talking about the SLR Lounge Preset system. I’m not going to go into detail about the system as you can find plenty of info and reviews either on here or elsewhere online. I will say that it is very well designed and does a great job at encouraging creativity. And everything is named properly! I can’t stand stupid names for Presets. 

before

after

About the Guest Contributor

Max Bridge began his career within the film industry, starting as a Runner and ending as a 2nd AC (assistant cameraman). Max worked on everything from a banned horror film to multi-million pound commercials crewed by top industry professionals. After suffering a back injury, he left the film industry and is now using his knowledge to pursue a career within photography.

 You can find Max on Twitter, Facebook, Pinterest, his blog and his website.

Julia Kuzmenko McKim on Mastering Brushes For Dodge & Burn Work

$
0
0

wacom-tablet-review-intuos-pro-photography-10

Photography is a sexy field, isn’t it? (Rhetorical). No really, to those who aren’t photographers, we can appear to have this sort of unashamedly fun vocation, devoid of the nitty gritty minutiae that plagues most work.

Except we know better.

It is, or can be a sexy field, but there are mountains of the tedious to climb in order to produce the product. Once it becomes a business, there’s that side of it to contend with and all the accounting, planning, budgeting, deals that don’t come through, mishaps, and all the rest that goes along with it. But even before that, there’s always work by way of volumes of material to learn before proper execution of the craft can be done.

Skipping some of those steps, while common, will cost in the long run. They can cost time, and clients. I regularly see photographers out shooting without a proper, basic knowledge and understanding of what the features of their camera actually do, and that’s sad, because with that understanding, when the knowledge becomes second nature, that’s when creativity can really flow unimpeded. It’s why a foundation is necessary for any skill, and what we’re trying to achieve with Photography 101.

julia-kuzmenko-mckim-photoshop-slrounge-wacom-intuos-tablet-brush-photography-3 julia-kuzmenko-mckim-photoshop-slrounge-wacom-intuos-tablet-brush-photography-2

Likewise, this sort of neglect of the tedious stuff is utterly rampant in post processing. It’s understandable, as creatives, sometimes it doesn’t speak to our inner selves to grind through the operating manual or instructional video learning things that aren’t immediately applicable, or is just sort of dry. This neatly brings me to the video featured here.

Many of you, perhaps just shy of all of you know of Julia Kuzmenko McKim and her prowess in the field of retouching. She was recently featured as one of B&H’s favorites of 2014 which is a great source of inspiration, and she has a veritable well of knowledge to share about retouching. In this particular video, she discusses the how-to and whys of mastering your brushes for dodging and burning. From explaining the flow and opacity, to how to manipulate your settings for what look, it’s here. It’s not the sexiest of videos, but it is extremely useful and easy to follow along. It’s one of those tutorials that will pay dividends in almost every aspect of your retouching in Photoshop.

julia-kuzmenko-mckim-photoshop-slrounge-wacom-intuos-tablet-brush-photography-1

[REWIND: Why You Need A Tablet & How It’ll Transform Your Lightroom Workflow]

Most of this will apply to those of you using Wacom tablets, and to those of you who aren’t you’ll still get use out of it, though I can’t stress enough the importance of including one of these pen tablets into your arsenal. It doesn’t even have to be an extremely expensive one, and you can read my reviews of two at opposite ends of the pricing structure starting at $75; here, for the Intuos Pen & Touch, and here for the Intuos Pro Large.

wacom-tablet-review-intuos-pro-photography-6 wacom-tablet-review-intuos-pro-photography-3

You can find some of her top-notch retouching resources right here in our store, and to scoop more from Julia’s well, and you should, you can keep up with her blog for frequent updates and her site for her body of work

How To Save Your Images To The Web, And Look Like You Intended

$
0
0

It is a common problem that is discussed on nearly every social network, and on nearly every photography forum: How to save your images for the web so that they look the best when viewed on Facebook, or 500px, or any other website you may be uploading your images to.

aaron-nace

Phlearn’s Aaron Nace, courtesy of CreativeLive’s Photoshop Week, shares how to save your images for the web using Photoshop. This 8 minute video is a great step-by-step walk through for anyone who wants their images to look as great on the web as they do on their screen at home.

Aaron takes you through choosing your color space, what image format to save the file in, and what quality settings to use for the best results. This has got to be one of the most in-depth ‘saving for the web’ videos that I have seen personally, and it taught me some things that I was not aware of. I highly recommend taking a few minutes to check it out; your Facebook followers and photography site will thank you.

If you are exporting from Lightroom, you can take advantage of the SLR Lounge Lightroom Preset System‘s Export ‘Web/Blog/Email’ preset, which will also give you some great results.

What are your thoughts on saving your images for the web? What tips and tricks do you use to get the most out of your web images? Leave a comment below and share the info!

Old School Photo-Editing | Darkroom Techniques That Gave Birth To Photoshop Tools

$
0
0

Photoshop-darkroom-dodge-burn-slrlounge.photography-3

Photoshop is celebrating its 25th anniversary with a little fanfare, and that makes sense as there is a lot to celebrate. By any measure, Photoshop is certainly a success, given that it’s the last word in photo editing software, and has become a household name. We refer to images that have been altered as ‘Photoshopped’ even if a different program was used, the same way we say Kleenex for any form of facial tissue. That’s brand name marketing and cultural integration you can’t buy, and that only comes when you’re the quintessential of your kind.

Now, of course, that kind of cache comes with a notoriety that’s good and bad. The program is as synonymous with critique as it is with praise, and some of the areas it gets faulted for, it may not deserve – well not entirely.

Photoshop-darkroom-dodge-burn-slrlounge.photography-5 Photoshop-darkroom-dodge-burn-slrlounge.photography-1

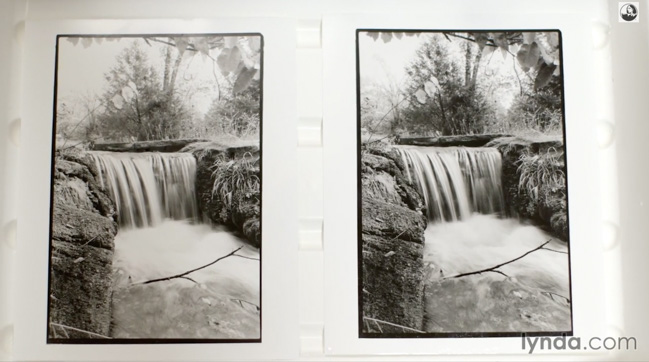
There’s this idea held by many even within photography circles (more the younger ones), that prior to Photoshop, there was no image manipulation, that great images were made entirely in camera, printed, and that’s it. But that couldn’t be further from the truth. Now this isn’t to say the pixel bending done in Photoshop was possible with film, but there were many ‘edits’ that could be applied during the developing process to make an image quite different from SOOC, and many of those processes inspired the tools and processes we have come to know and love in Photoshop. Applying a gradient filter? Sure. Sharpening? Yes. Dodging and burning? Of course.

[REWIND: ‘Affinity Photo’ Seems To Be The First Real Photoshop Alternative | Get The Beta Version Free]

Photoshop-darkroom-dodge-burn-slrlounge.photography-4

In a digital age, there is a generation already who have never been in a darkroom and have little to no concept of the developing process. So, to mark the quarter century and remind us all about the real genesis of ‘Photoshop’, Lynda has put together a short video featuring photographer Konrad Eek as he goes through the process of developing a print using dodging and burning, masks, feathering, and adding gradients. It’s a nice blast from the past, and may instill a little more appreciation of both Photoshop and what inspired it.

Source: PetaPixel

How To Fix Flyaway Hairs In Photoshop

$
0
0

Dealing with hair during your post-processing can be such a pain. This is especially true if you can’t afford to have an assistant or hair stylist on hand to help keep it under control during the shoot. But it doesn’t have to be such a pain.

flyaways-photoshop

As part of the Photoshop Week CreativeLive had Chris Orwig on hand to show us how to deal with those pesky flyaway hairs in Photoshop without ripping out our own hair! I especially liked the part where he talks about reduction, rather than removal. I think that this is an important concept many photographers new to post-production overlook.

[REWIND: FEELING CREATIVELY BURNED OUT? HERE ARE 3 EXERCISES TO HELP YOU GET INSPIRED.]

It won’t always be as easy as it was in this video. Sometimes, the healing brush can get confused, or it doesn’t look quite right. But that said, more times than not, I have found that when you need to remove individual flyaways like the one in that video, the method he shows us works wonderfully.

What other methods do you use when you have to touch up the hair of your subject? Leave a comment below and let us know how you fix hair in Photoshop!

Phlearn Pro Tutorial Review: The Beginner’s Guide to Levitation

$
0
0

If you’ve spent any amount of time online looking through images on websites like 500px, you’ve probably come across a number of amazing levitation images. “How do they do that?” you may have wondered. You could become a magician and learn to make people float in the air or you can harness the power of Photoshop.

In this Phlearn Pro tutorial, Aaron Nace breaks down several different ways to create your own levitation images and amaze your viewing audience.

[REWIND: THE BEST WAY TO CUT OUT HAIR IN PHOTOSHOP: PHLEARN PRO TUTORIAL REVIEW]

phlearn_pro_tutorial_beginners_guide_to_levitation_pic5

I’ve followed Phlearn and Aaron Nace for several years now. Aaron has a way of making complex ideas and processes easier to work with while entertaining you the entire way. It’s because of that I decided to give this Phlearn Pro tutorial a spin. Being primarily a portrait photographer, I would consider myself to be an absolute beginner at levitation photography. I was definitely interested to see if this tutorial would get me up to speed.

Phlearn Pro Tutorial Review: The Beginner’s Guide to Levitation

Once you download the files, the folders are clearly marked with their contents. There are seperate folders for each of the different levitation techniques, as well as tutorials on the photography techniques and tools/brushes that are useful. I started off this journey in the most likely place, a folder titled “Start Here.” In it, you’ll find a detailed video explaining how to quickly and easily navigate through all of the other content in the tutorial. Having purchased Phlearn tutorials in the past I skimmed through the first video, but it’s definitely a must-watch for those watching these tutorials for the first time.

phlearn_pro_tutorial_beginners_guide_to_levitation_pic1

In the photography tutorial video, Aaron breaks down the various methods of achieving the levitation effect, as well as detailing the gear used, and settings (which I found very useful). He also gave a lot of little tips that I definitely would not have thought of had I attempted this on my own. I re-watched the video a second time and I felt that the photography portion of this tutorial was comprehensive enough to answer most every question you would have regarding this technique.

phlearn_pro_tutorial_beginners_guide_to_levitation_pic3

An extremely important part of this technique is knowing how to use what many call one of the most difficult tools in Photoshop, the pen tool. Knowing that this might be a barrier of entry into the world of levitation photography, the folks at Phlearn wisely added an excellent tutorial video titled the “Ultimate Pen Tool Guide.” I didn’t have much experience using the tool, but I followed alongside Aaron (since all of the images he uses in all of the video tutorials are included with the download) and cut out a sports car from a background just as he showed in the video. For me, this tutorial was worth the entire price of the Phlearn Pro tutorial on its own, so I was excited to move through the rest of the package to see what other techniques I could (ph)learn.

phlearn_pro_tutorial_beginners_guide_to_levitation_pic4

With the photography and pen tutorials out of the way, it was then time to dig into the Photoshop tutorial segments. Each of the 3 levitation methods was broken up into their own folders, each with 3 to 4 videos conveniently broken up to make following along a bit easier. Aaron has been around the block a few times when it comes to teaching Photoshop, and he really makes the entire process look easy enough to make you want to follow along. The nice thing about breaking up the 3 different techniques into their own tutorials is that you don’t have to watch the entire 5 hours of content before going out and shooting your own levitation shots. If you watch the photography tutorial video and decide, for example, that you like one of the methods over the other, you can just follow along with that track and get through it in about an hour.

Overall, I think that this tutorial is a worthwhile investment (it’s only $40) for anyone looking to get started with levitation photography, as well as mastering compositing tools and techniques in Photoshop. If I had to nitpick, I’d say I wished that the photography part of the tutorial used gear that was a little more common (strobes/speedlites vs Kino Flos), just to take away any excuses someone might have towards approaching these techniques. With that little thing aside, I’d definitely recommend this tutorial.

Pros

*Pen tool tutorials were excellent
*High production value throughout
*Easy to follow & entertaining
*Affordable at $39.99

Cons

*Used expensive Kino Flo lighting – wish he used speedlites or strobes to demonstrate the photography portion

Buy the Phlearn Pro Tutorial: The Beginner’s Guide to Levitation

If you’re interested in adding this extra element into your photography, check out the Phlearn Pro Tutorial: The Beginners Guide to Levitation here. If you are a Photoshop newbie, you might also want to check out Phlearn’s Photoshop 101 and 201 in the SLR Lounge store.


Liquify Filter: You’re Doing it Wrong | A Simple Guide On How To Properly Use It

$
0
0

The Liquify Filter in Photoshop is a powerful tool. It can make a jiggly arm, slim; a chin disappear with a flick of your mouse and turn a celebrity into a waif mere seconds. It’s like a plastic surgeon in the form of a button and it’s widely misused and blamed for its hand in “making unrealistic body proportions,” according to Jeff Rojas.

In the following video, Jeff shows us how to use the tools in the Liquify Filter to make your retouching look natural, and not questionable, like Lindsay Lohan’s recent Photoshop gaffe below. In the aforementioned photograph that Lindsey posted on Instagram the other day, it looks like in an effort to enhance her assets, she got a bit carried away and warped not only her backside, but the doorframe behind her. But I digress.

lindsay-lohan-photoshop-fail

The point is, don’t do it. Watch the video to learn how to properly use the Liquify Filter so this doesn’t happen to you. Even if you are well versed in Photoshop and Liquify, this 7 minute video is still worth a watch as Jeff gives some good tips as he goes through all the basic tools in the liquify filter and how they can be used in your images. He then shows us the various tools in action, as he makes small and subtle changes to enhance his image.

[REWIND: PHOTOSHOP TIPS: HOW TO SHAPE HAIR USING THE LIQUIFY TOOL]

Liquify-filter-1

In my opinion, when it comes to Photoshop, the more subtle the change, the better. I once had a client that insisted on having every single photo in her wedding album retouched so that her arm was stick thin slender and her pointed chin was rounded and smoothed out. My initial retouching was too subtle for her taste and she insisted that I comply with her requests. The final images did not even look like her, but that’s exactly what she wanted. Photoshop is a powerful tool, use it wisely.

Watch Jeff’s video below to see how to use the Liquify Filters to enhance your images and keep the body properly proportioned.

[Via ISO1200/Jeff Rojas]

How To Add Atmosphere To Your Images In Photoshop Without Presets

$
0
0

nino-bastista-photoshop-atmosphere-tutorial-slrlounge-photography-1-2

When anyone embarks on the journey to be a photographer, to really nail the craft and have it be a creative expression of self, it’s hard to imagine that they see a clinically executed ‘properly exposed’ image as the be-all and end-all. There’s a time and place for that, but like most Italian laws, most photographic laws are meant as guidelines, and meant to be broken once understood.

If we were all to be presented with a scene and expose it according to textbook, there would be no flair, no individuality, no atmosphere, and no one wants that. This is much the reason for the proliferation of preset systems like VSCO, and our own SLR Lounge Preset System, because people want to add that artistic flare to their work. As incredible as these systems are, and they are, they will never be everything you want at all times, and knowing how to manually add atmospheric elements to an image will go a long way with you in your career.

nino-bastista-photoshop-atmosphere-tutorial-slrlounge-photography-1

Nino Batista is a fashion, glamour, model and exotic automobile photographer (and an internationally published one at that). One of the things he does quite well is add artificial atmospheric elements to his images, and has created a video to share how he does so.

If you look at a large volume of photographic work on a regular basis, as I do, you’ll notice common weak spots and this is a general one. The type of elements Nino adds, are not necessarily uncommon, in fact they are quite common. However, as with so much in life, the devil’s in the details, and it’s how his are created and applied with subtlety and care that makes all the difference. In essence, there is a sort of gradual building and enhancing of what’s already there, rather than totally creating a scene from scratch. I think keeping in mind the old chestnut that perfection is achieved not when there is nothing left to add, but nothing left to take away, would serve anyone well in this type of process.

nino-bastista-photoshop-atmosphere-tutorial-slrlounge-photography-3

nino-bastista-photoshop-atmosphere-tutorial-slrlounge-photography-4

[REWIND: My Go-To Beauty Retouch Technique Video]

The video is beneficial from the standpoint that you see the tools he uses to create certain effects in Photoshop, but more than that, it shows you the steps and process within which he works, which can give all sorts of small tips, and would have you likely looking at tools in Photoshop in a new light, therefore empowering you to do more on your own. It’s certainly worth a watch, and worth your time to visit his YouTube channel and Facebook for more, as he does some good work.

Source: Nino Batista YouTube, images are screen captures from featured video

Take Your Wildlife Photos To Another Level By Enhancing The Eyes

$
0
0

It is not uncommon for photographers to touch up a subject’s eyes after a portrait or wedding session, but did you know that doing so on your wildlife photos can have a profound impact as well?

wildlife-eye-enchancement

Steve Perry is back with another great quick tip on processing your wildlife images, and this time he is talking about using Photoshop to touch up the eyes of the wildlife in your image. It may seem like something small and minor, but as often seems to be the case in photography, it’s the small things you do that add up to make the difference between a decent shot and a great one.

I personally never take my wildlife photos into Photoshop for eye enhancement. I just pull it up in Lightroom and use the eye enhancer brush presets included in the SLR Lounge Lightroom Preset System. That said, I may start doing this, as I do take them into Photoshop occasionally to do other things, so switching to this method for the eyes would be easy to add to my list.

In the wild, you don’t have the ability to control your light, or get your subject to turn a certain direction for a better catchlight. You get what you are given, and so you sometimes need to modify images after the fact in order to really display what you wanted to capture.

Just as in portraiture, small things like calculated eye enhancement are critical to making a great final image. It doesn’t just stop with the shutter slap. If you want to take your wildlife -or any – images to the next level, get into the habit of taking the time to process them correctly with great tips like this.

For more from Steve Perry, you can check out his website or Youtube Channel.

[via Steve Perry]

Get Color Right In Your Images By Geeking It Out

$
0
0

minute-physics-explaantion-color-photoshop-slrlounge-photography-2

One of the issues we’ll run into now in a digital age is that computers are generally going to render things like color differently from the human eye, though we are always trying to capture and render a scene as we see it. The information that follows is yawn inducing to some, but may just be incredibly useful, and MinutePhyics tries to explain it for us.

When you put colors adjacent in Photoshop and blend/put them out of focus, there is the appearance of a weird dark area. This phenomenon doesn’t occur in natural life with your eyes, where the colors would blend smoothly.

This color blending issue isn’t limited to digital photo blurring either, as on most occasions when a computer blurs an image or tries to facilitate transparent edges, the same thing will occur. The solution, thankfully, is a rather simple one, though it takes a little explanation about how our eye perceives things to understand why.

minute-physics-explaantion-color-photoshop-slrlounge-photography-3

Human vision, like our hearing, works on a relatively logarithmic scale, and in terms of vision, we perceive small changes in dark scenes better than small changes in bright scenes. Digital camera sensors detect brightness solely on the number of photons hitting the photo detector, so an increase in photons register the same increase in brightness regardless of the surrounding scene. When your computer stores the image, it just records a different brightness value for each color (RGB) at each point of the image. Total darkness recorded as 0 and brightness at 1. So a halfway mark may be 0.5.

This is where things get a little interesting, because while the initial math may indicate that 0.5 is half brightness, it’s actually only 1/5th of the photons. Basically, the images are designed to be darker than the numbers suggest and that is done deliberately because of what was stated earlier; that the human eye perceives small changes in darkness better than small changes in brightness. Simply put, digital cameras store the square roots of the brightness values and not the actual values, and the gradients of dark colors with more data points and bright ones with fewer – all because of how our eyes sense the difference between darkness vs lightness. Once it needs to be shown on a monitor, the number is just squared back.

minute-physics-explaantion-color-photoshop-slrlounge-photography-4

So why would there be a problem? Well there wouldn’t be if the file would be left as is, but if we begin to adjust the file, the trouble generally starts. When we blur, each pixel is replaced by an average of the surrounding pixels, but if you take the average before or after, the square rooting will have a large effect. Most software does it after, which is not necessarily preferable. This is because the average, if taken after the square rooting, and the average of two square roots is less than the square root of the average.

Hopefully, you’ve lasted this long where I can say what this means and how you can better this in Photoshop. You can go into Photoshop’s settings and have it regard colors in the proper way by going to Edit>Color Settings>More Options and ensure Blend RGB Colors Using Gamma is selected and set to 1.00.


Although photographers use light in some way at every stage of the process of producing their images, they tend to think about the dyes or pigments that produce the final result on paper when they think about the final product. For that reason, when editing an image they tend to think of colours blending with each other as if they were ink on paper. By default, Photoshop blends colours with a result that matches what you would expect when mixing inks.

The Blend RGB Colors Using Gamma option allows you to change this behavior so that colors blend as if they were light rather than ink […] Based on the way most photographers tend to think about the blending of colors in their images, I recommend leaving this option turned off.

minute-physics-explaantion-color-photoshop-slrlounge-photography-5

In practical use, you’ll see this quickly if you ever use the Airbursh tool and notice it looks a bit muddled. This will also apply to black and white images since the science, the physics of it, remains the same where the photon number is square rooted by the camera sensor. However, as someone who likes to shoot in black and white, I would caution you to be careful with this if you are going for very contrasty hard images, as the blurring will soften the image making for less sharp lines.

Note: To see this work, you should switch your color profile mode from 8-bit to 32-bit.

Source: MinutePhysics

Creating a Logo and Placing It In Perspective | Phlearn

$
0
0

Oh, the joys of logo creation. As a new photographer, we look for any way we can to save some money. It’s expensive to start a business and so we’ll rent lenses, buy the cheapest business cards, search for the free WordPress sites, etc. And one thing many newbies also do is create their own logo.

In my seven year career as a photographer, I’ve had maybe 6 logos – all self-made. I’ve not loved any of them and they were far fro anything that would win a graphic design award. Looking back, I should’ve just bitten the bullet and hired a graphic designer who knew what they were doing to create something I loved.

Alas, making a logo is one of the cornerstones of your brand, so it would be wise, if you are thinking of creating  one for yourself, to know how to do it and do it well. In the following Phlearn tutorial, Aaron Nace shows us how to create a logo and then place it in a photo in perspective (in case you want to plaster it on some object in an image). The video is divided into three sections. The first section is about creating the actual logo while the last two sections teach you how to size it and place it in perspective properly.

Create-logo-1

Of course, professional logos usually are not created in Photoshop, but this works if you’re in a pinch and who doesn’t love a Phlearn tutorial? The bloopers at the end are always fun. Enjoy.

Watch How to Create and Place a Logo in Perspective

If you are new to Photoshop and would like to learn more from Phlearn, be sure to check out the Photoshop 101 and 201 tutorials in the SLR Lounge store.

Photoshop Trick Using the BW Adjustment Layer To Brilliantly Alter Color

$
0
0

jimmy-mcintyre-photoshop-tutorial-luminosity-photography-slrlounge-4

One of the most frustrating aspects of Photoshop is that its abilities are so far reaching, that to master it (if it’s possible to do such a thing), requires a tremendous amount of time and dedication. Strangely, that is also one of the wonderful things about Photoshop because in all likelihood even if you’re used to doing something one way, there’s a way to do it better. Few are better at highlighting this than Jimmy McIntyre.

Earlier in the year, we shared a video of Jimmy’s where in 7 minutes, he illustrates with prodigious fluency and potency, just how powerful Photoshop blend modes are, and how fast they can be manipulated for effect. In the video herein, he takes 3 minutes to highlight a way to adjust your images, in particular, the brightness of colors, for a similarly impressive effect.

jimmy-mcintyre-photoshop-tutorial-luminosity-photography-slrlounge-1

This may not be new to some of you, but for those that it is, you’ll surely appreciate it. While doing something seemingly simple in Photoshop can often seem like you need to create loads of layers, and that it’s almost impossible to get anywhere in a straight line, all that’s involved in this case is the creation of a black-and-white adjustment layer; then changing the blend mode to Luminosity, and finally using the intuitive sliders to make the desired alterations.

That’s it.

jimmy-mcintyre-photoshop-tutorial-luminosity-photography-slrlounge-2

jimmy-mcintyre-photoshop-tutorial-luminosity-photography-slrlounge-3

The wonderful thing about this method, aside from how simple it is to apply, is that you’re working with a very narrow range of colors, so the changes can be subtle if you want, and tend not to ‘bleed.’ Also, even though the change is global, it’s easy to mask and brush in or out as you like.

[REWIND: How To Use Blend Modes To Totally Revamp Your Photography | Brilliant Work From Jimmy McIntyre]

If this is anything to go by, do take the time to check out what Jimmy has to offer on his site, as it’s sure also to be worth your time and impress. You can find him on his site for workshops and tutorials here and on 500px.

New Adobe CC Updates – Initial Thoughts and Impressions

$
0
0

Adobe CC’s new massive update was released a little under two weeks ago, bringing some new features to both Lightroom and Photoshop. I imagine, like me, most of you have downloaded the updates and continued working, not really having much time to look into what’s new. If you’re still time poor and would love someone to run through it all for you, tell you what’s good and what’s worthless, then take a look at this video from Ted Forbes over at The Art Of Photography. He discusses the major improvements, giving us his somewhat sarcastic view of the good and the bad. Check out the video below:

Adobe Creative Cloud 2015 Updates (Photography Edition)

The New Dehaze Slider

Thus far, for my personal taste and style of photography, the Dehaze filter is not something which excites me too much. I can see how it may be useful for cityscapes or landscapes where you don’t want haze and only have one day to shoot, but for my purposes (nature, portraits) it doesn’t add much. In my nature photography, I actively seek haze and fog as I love the extra dimension it adds; it has a wonderful transformative quality.

Now that all sounds pretty negative, and I tend to be a little pessimistic with these kinds of sliders; they just seem like editing shortcuts which actually limit your control in favor of speed. That being said, it’s always nice to be given an extra setting to mess around with. Usually those far more creative than myself come up with fantastic ways to use it. Which leads me nicely onto this video by Sept Nimittaganon.

Sept thought that Dehaze worked well with photos, so decided to give it a go with video. The video shows haze being gradually added or removed through a selection of timelapses. Again, I’m not totally sold on this, but as Sept says, this is only an initial test, and I can clearly see the creative possibilities once this technique can be refined.

Some Quick Tests Of The Dehaze Slider

Here are a few shots of my own where I gradually increased the Dehaze slider to see what the effect would be. A few things to note:

  1.  As you increase the effect (decrease Haze), the shadows are significantly darkened
  2. Saturation also increases
  3. An exposure bump is often necessary the more you apply the effect
  4. Don’t even bother with noisy images. The effect introduces quite a lot of noise anyway, resulting in unusable images.

Here’s my original edited image.
applying-the-dehaze-filter

Dehaze slider at 20
is-the-dehaze-filter-any-good

Dehaze slider at 40
removing-haze-from-images

Dehaze slider at 60
using-the-dehaze-filter

And just for fun, Dehaze slider at 100 – a bit of a mess!
untitled-5

As I increased the effect, I made adjustments to Saturation, Vibrance, and Shadows to compensate. If you note the differences between the tree in the background and the ones in the distance, you can clearly see the effect at work. Obviously taking it all the way to 100 is horrendous but it’s certainly useable at lower settings.

[REWIND: FREE PRESET PACK TO BRING DEHAZE TO YOUR NON-CC LIGHTROOM]

Speed Improvements In Photoshop

The updates that I’m most impressed by are the speed improvements we’ll see in Photoshop due to the addition of the Mercury Graphics Engine. Specifically, the healing brush should now render in real-time, and both the spot healing brush and Patch tool will be up to 120x faster! Now that is pretty amazing! Clearly worthy of a few sentences ending in exclamation marks! Why? If you don’t spend extended periods of time doing in-depth retouching, it won’t mean much to you, but if you do, then you will understand that any time saved is a godsend. For those that make a living professionally retouching images, this speed improvement could have a huge impact.

I was recently designing a flyer and decided to use the image you see below. When I first edited this, the thought of cleaning up the Wendy house was not particularly appealing. Given that it was now going on a flyer and with the new improvements, I thought it was worth a go. It wasn’t being printed really large, so I did a very quick job, but I was amazed at the speed and accuracy of these tools. Check out the before and after below. I am almost looking forward to the next time I have to spend a couple of hours editing a portrait.

Before:

speed-increases-to-photoshop-healing-brushes

After:

speed-increase-to-photoshop-in-creative-cloud-update

Have you tried out some of the new features? What do you all think? Let me know in the comments below.


A Quick Photoshop Technique to Enhance Details In Your Image

$
0
0

Photoshop-enhance-1When I first started in photography, there was this trend where images were super crisp and very sharp. It was abused, of course, (as Photoshop often is) and more often than not, you’d see severely oversharpened images (especially around the eyes). I’ll admit, I’m one of the guilty ones, due to a lack of Photoshop knowledge and an action I purchased and didn’t know how to use properly.
[REWIND: 3.2 MILLION WATCHED MINUTES OF PHOTOSHOP EDUCATION IN 50 VIDEOS | PHOTOSHOP PLAYBOOK]

To get great detail in your image, subtlety is key and this quick tip from Jimmy McIntyre will help enhance your image without overdoing it. In the first part of the 2-minute video, Jimmy uses the Raya Pro panel (a product he sells) to quickly touch up the areas on the rock. The last part of the video shows you how you can get the same effect if you don’t have Raya Pro and he shows you how to use High Pass instead. A note of warning when you use the High Pass technique, the higher you go with the radius, you’ll start seeing haloing and edging around objects, so as with all things Photoshop, less is more.

Quick Photoshop Secrets 6: How To Enhance Details Beautifully

If you’re looking to increase your Photoshop knowledge, be sure to check out Phlearn’s Photoshop 101 and 201 tutorials in our SLR Lounge store or the following articles for more tips and tricks:

[Via ISO 1200]

Astropad | Turn Your iPad Into a Wacom Cintiq-Like Graphic Tablet For $20

$
0
0

astropad-graphic-tablet-wacom-intuos-apple-photoshop-lightroom-photography-slrlounge-4

It’s somewhat incredible, if not entirely predictable ,that the iPad may turn out to be a photographer’s closest friend. I remember when it was being released, and I asked Apple reps in three countries to sell me on the iPad. None could really do it. What I often got was an answer similar to what you’ll hear when you ask a woman what it is about a guy that she likes, only too often to hear, ‘I don’t know, it’s just something about him.’ That’s what it was with the iPad, ‘there’s just something about it.’ True dat.

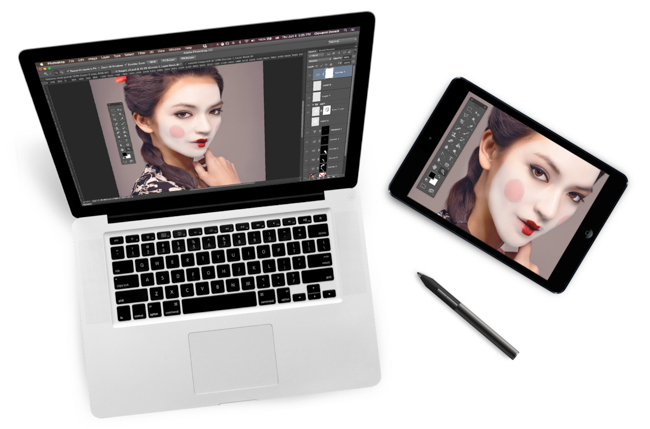
The thing is, they are sort of costly to hinge their purchase on ‘there’s just something about it,’ but within the past year, iPads, for photographers anyway, have truly come into their own as a companion piece of necessary equipment. Their newest innards are powerful enough to really make wireless ‘screening’ of images speedy enough for proper use, Lightroom Mobile is making strides, apps like CTRL+Console take the Lightroom user experience higher, and that retina screen is really a beauty. If we’re honest though, what we’ve always wanted is for the iPad to be a usable graphics tablet. Now, thanks to two former Apple engineers and their app Astropad, that’s what it’s become.

astropad-graphic-tablet-wacom-intuos-apple-photoshop-lightroom-photography-slrlounge-2

I could harp on and on, unless you punch me in time, about the value of owning and incorporating a Wacom tablet into your post processing. It remains THE most essential piece of equipment outside of my camera and lenses for modern photography. I encourage you to get one. The price of some can be prohibitive, or at least an added expense you may try to do without.

If, by chance, you already have an iPad, Astropad may be just the ticket for you at just $20. You don’t even necessarily need a stylus, especially given the easy ability to pinch zoom, (though a stylus would improve accuracy and ease), and allow for more features. There are a wide variety of styli that it works with so you likely have one already. Its customizable shortcuts and keys can be displayed as an overlay on the screen for ease of use.

astropad-graphic-tablet-wacom-intuos-apple-photoshop-lightroom-photography-slrlounge-5 astropad-graphic-tablet-wacom-intuos-apple-photoshop-lightroom-photography-slrlounge-3

What Astropad IS, is an app that is built for creative professionals that allows the iPad to be used as an interactive graphic tablet with any Mac app (no drivers needed), powered by a technology called Liquid; That keeps iPad colors true to source, uncompressed live-view image quality, GPU-accelerated for speed, and gets 60fps with USB cable for smooth fluid responsiveness. So what Astropad DOES, is sort of turn your iPad into a small Wacom Cintiq, for $20.

wacom-tablet-review-intuos-pro-photography-3

So should you get it and is it a substitute for a Wacom? The truth is, that’s a grey area. For $20, I hardly see this as a poor purchase, but would caution that you would be best suited if you have a very recent iPad, like a generation within two years old. Also, if you’re an avid Wacom user, the adjustment of workflow may be something to consider. I’m so used to moving my hand while looking at the screen that the adjustment will take time.

[REWIND: Wacom Intuos Pen & Touch Tablet | Review & Thoughts]

If you have a medium or larger Intuos, you will know that moving around with it isn’t always ideal, and if you already have an iPad, this seems to be a great mobile solution. The Wacom will be more precise and so forth, at least for the time being, so if you’re going to do heavy work, or in large volumes, that’s still the route I would go. If you’re interested to see which I would recommend, take a look at my reviews of the Intuos Pen & Touch and the Intuos Pro Large. I tend to recommend the small of either the Pro or regular since I use a small working area, and that you can get for around $70.

Find out more about Astropad and get it here

How To Remove A Tattoo In Photoshop | Aaron Nace

$
0
0

photoshop-tattoo-removal-aaron-nace-phlearn-photography-slrlounge-8

Ever had a night out where the whole purpose of the evening’s debauchery was to get hopped up enough make some bad decisions? Of course you have, you saucy thing. That bad decision may have been the company you kept, a late night burrito, or as it often is, a tattoo. Or maybe you have a tattoo reflecting an old flame you’re looking to put out, or realized having just tired of one you’ve got. For whatever reason, you have a tattoo and you want it removed and Photoshop can help. Well, it can help temporarily.

Actually, removing a tattoo in post has a lot of practical applications which can be presented in many scenarios. You may have a bride that has one she prefers to not be visible in some of her photos, or a model you’re shooting may be tatted in such a way or in such a place that you need it removed by request of a brand or agency.

In the video herein, Aaron Nace and the Phlearn team have broken down how you can remove a tattoo from someone using Photoshop and make it look as if, maybe, they’d never had one to begin with. The process, is actually quite deceptive in simplicity, especially since you may be tempted to use basic clone or patch tools to achieve your look, but really this is more effective a solution.

[REWIND: How To Add A Realistic Tattoo To a Person With Photoshop]

The Three Steps Are Broken Down

Basic Removal: This is where you’ll use the Spot Healing Brush set to Normal and Type to content aware. This is the most basic step that involves just painting over a certain layer, working best doing smaller sections at once, and you can expect blotchy look, but the whole point of this part is to rid the skin of the tattoo – perfecting it comes next.

photoshop-tattoo-removal-aaron-nace-phlearn-photography-slrlounge-3

Painting the Skin: It’s in this step you’ll begin to paint over the blotchy skin created in the first steps. You’ll be sampling some natural skin and aiming to paint by paying attention to highlights and shadows so you don’t just end up with a flat looking section of the body. The devil here is certainly in the details and you can expect to sample often. Aaron suggests keeping a very low flow to your brush, around 5 to 20, though honestly I typically keep my flow around 2 to keep things as gradual as possible. Lower, even, if need be.

photoshop-tattoo-removal-aaron-nace-phlearn-photography-slrlounge-7

Adding Skin Texture:  By this point, you should have good color grading, but it WILL look painted and unreal. This is clearly not what you’ll want so you’ll aim next to go in and add texture back into the skin. In this example, it’s done by adding layers of noise and blur set to overlay, and you can end up with something very, very good. I often use the patch tool whilst working within the Texture layer during frequency separation to take skin texture from one area to another. It can work wonders and do so quickly.

photoshop-tattoo-removal-aaron-nace-phlearn-photography-slrlounge-5

Additional details can be seen in the video itself, and if it wasn’t apparent from the video, I highly recommend you use a Wacom pen tablet to do this sort of work, or indeed any Photoshop or Lightroom work. Aaron uses the Intuos Pro Small, and this is a great tablet. If you’re looking for something less intense and less expensive, I highly recommend the Intuos Pen & Touch Small, as it’s most of what most everyone will need for their processing work. You can see our review of it here, and a review of the Pro series here and make your choice.

photoshop-tattoo-removal-aaron-nace-phlearn-photography-slrlounge-7 photoshop-tattoo-removal-aaron-nace-phlearn-photography-slrlounge-6

For more Photoshop tutorials by Phlearn, check out PHOTOSHOP 101 AND PHOTOSHOP 201 BY PHLEARN in the SLR Lounge store!

Happy editing.

Source: Phlearn

5 Things You Didn’t Know You Could Do in Photoshop

$
0
0

Photoshop is one of those tools that most people have heard of, but few know how to properly use. It’s a very powerful beast. It can be used to turn your images into magical worlds or you can use it incorrectly and become the laughingstock of the world. This is why you should find all the Photoshop tutorials you can get your hands on and learn all you can about the photographer’s favorite post-processing tool. We have many articles on the topic, as well as offer Phlearn’s Photoshop 101 and 201 in our SLR Lounge store, if you’re working on mastery of Photoshop.

photoshop-tricks

There is so much that you can do in Photoshop that even if you are adept, there might be some tricks you didn’t know about, and the following video by Photoshop Training Channel highlights 5 of them. Titled, 5 Photoshop Tricks You Don’t Know About, the 9-minute video goes over some useful techniques that the general Photoshop user may or may not know.

  • Photoshop Trick 1: Advanced Blending Options
  • Photoshop Trick 2: Precise Flare
  • Photoshop Trick 3: Clouds With more Contrast
  • Photoshop Trick 4: Black and White Adjustment Layer to Control Luminosity
  • Photoshop Trick 5: Opening the Same Image in Two Windows

Be sure to watch the video below for how these tricks are done and let us know in the comments which ones you knew, or if you have any Photoshop tricks that you use that we may not know about.

Watch 5 Photoshop Tricks You Don’t Know

[Via Reddit/Photoshop Training Channel]

Easily Create Great HDR Images From A Single RAW File

$
0
0

HDR-wedding-venue-photography-tip-650x433

One of the most frustrating trends in photography, in my somewhat humble opinion, is HDR photography. Not that it exists, not that it doesn’t have its place and use because it does, and not even that it’s done with such frequency. The problem is that it’s all too often done so damn poorly.

HDR, in fact, can be utterly brilliant for all types of scenarios, and it’s a shame it has a bad rap and associated with negative slights, but your HDR photography doesn’t have to be a punchline.Taking a good HDR often requires numerous shots to be blended after the fact, but the challenges that presents aren’t few. Generally, things move in an image that require detailed analysis afterwards, and even if they didn’t, cameras do if even minutely, so you often require a very steady footing/tripod. But, you needn’t always fuss with taking numerous exposures to blend later on if you shoot correctly and know how to manage it in Photoshop.

jimmy-mcintyre-photoshop-HDR-RAW-landscape-photography-slrlounge

This is what photographer and educator Jimmy McIntyre teaches you how to do in a recent video. What he demonstrates is how to digitally blend a single RAW file that results in a natural, balanced, and effective HDR image. This method isn’t going to be as effective in some aspects as using multiple exposures, but depending on your situation, and also how well your camera handles RAW files regarding how many stops DR it’ll get, you could be in good shape. Jimmy, in typical Jimmy fashion, walks you through the steps on how to do this, in just a few short minutes using what he calls the ‘Rapid Blend-If Technique’.

What you’re essentially doing is opening a single RAW file in ACR, making the adjustments of exposure and highlights to the lighter portion (the sky in this instance), and then making that image a smart object. You will be rasterizing your layers once you’ve adjusted both, and then blending them, and you’ll see just how simple and effective this can be.

jimmy-mcintyre-photoshop-HDR-RAW-landscape-photography-slrlounge-3 jimmy-mcintyre-photoshop-HDR-RAW-landscape-photography-slrlounge-2

jimmy-mcintyre-photoshop-HDR-RAW-landscape-photography-slrlounge-4

Again, I stress that this method certainly depends on your camera sensor’s ability to handle dynamic range, and will not be as powerful as creating an HDR with multiple exposures, but it can do the job. If you’re looking to really produce top quality HDR images, the type that truly bring out the benefits of HDR without looking gaudy and over processed, allowing you to capture nighttime images, landscapes and so much more to a higher level, check this out. And if you really want to create effective HDR images from within Lightroom easily, our Lightroom Preset System has the ability to do it with a single click. You can find out more about it, and all else the system offers here.

Jimmy does some really fantastic tutorials, always keeping them as succinct as possible, and always pretty bulletproof. You can find more about and from Jimmy here on his site, and YouTube channel, and see other articles we’ve done featuring his work below:

How To Use Blend Modes To Totally Revamp Your Photography | Brilliant Work From Jimmy McIntyre
Photoshop Trick Using the BW Adjustment Layer To Brilliantly Alter Color

Viewing all 349 articles
Browse latest View live