When attempting to sharpen our images in Photoshop, what exactly is the software programmed to do to increase sharpness? Well, the software searches for edges throughout the image and exaggerates them to create the effect we know as sharpening.
The major disadvantage with this procedure is that the stronger the sharpening effect, the more apparent the black and white edges will appear, due to heavy contrast. Although we can mask these areas out, Jimmy McIntyre of Shutter Evolve has found a quicker and more accurate way to handle this issue.
[REWIND: YOUR FIRST 3 STEPS TO LEARNING PHOTOSHOP]
Although this technique may not work with every scene, you’ll find that it proves to be highly effective for most. The simplest way to define his method: find the larger edges in your scene and subtract them from the sharpening process. Here is a breakdown of his procedure:
Step 1: Duplicate your background layer and convert the duplicated layer into a Smart Object.
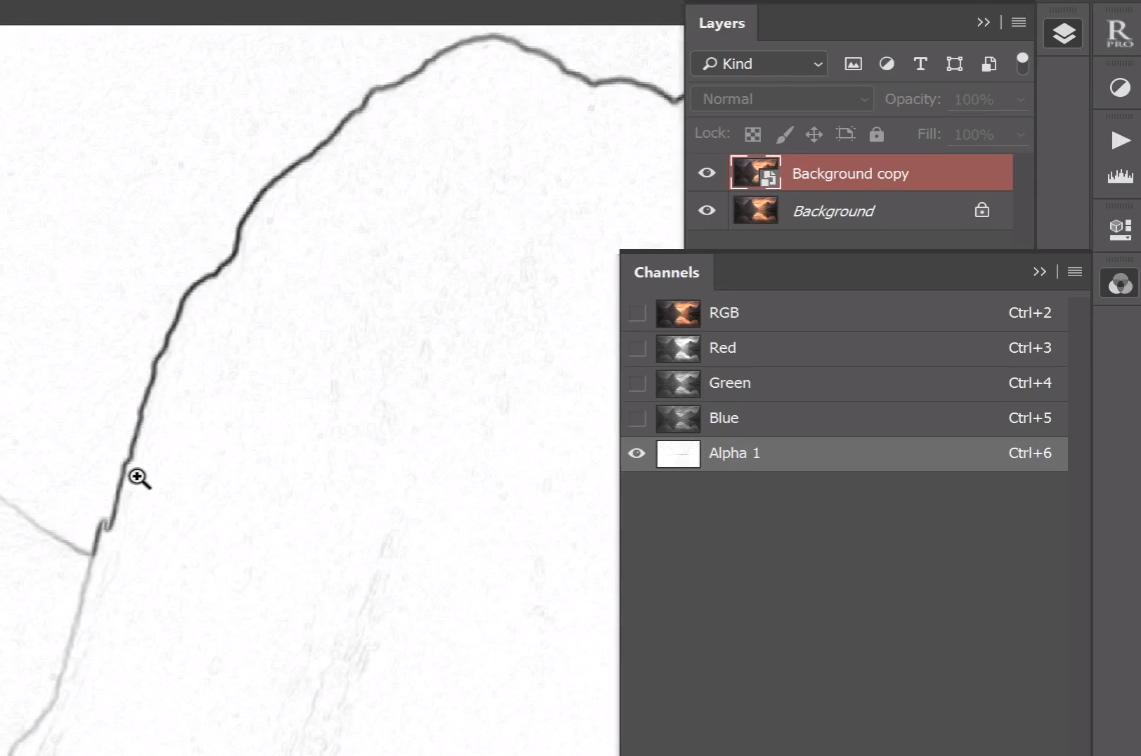
Step 2: Select your whole image (CTRL/Command+A), copy it (CTRL/Command+C), and create a new Alpha channel in the Channels tab. Paste your selection onto that “Alpha 1” Channel (CTRL/Command+V).
Step 3: To find the edges in our image, Go to Filter > Stylize > Find Edges.
Step 4: Open Levels adjustment (CTRL/Command+L) and adjust the sliders to create more contrast between the edges and white parts of the image (bringing the highlights down, shadows up, and mid-tones up) creating thicker dark edges as you’ll see in the image below.
[REWIND: Raya Pro Review | An Essential Panel For Photoshop?]
Step 5: Since our edges are now thick, we want to give them more of a natural effect, so to soften the lines go to Filer > Blur > Gaussian Blur and use a radius that suits your image (Jimmy prefers 3.6). You can bring the Shadows slider way up to add back in some of the contrast that was lost in the previous step if you like.
Step 6: Hold CTRL/Command and click on the “Alpha 1” channel to select these edges. Select the background duplicate layer, and create a mask.
Step 7: Select the same layer again, and go to Filter > Sharpen > Unsharp Mask and sharpen to your taste. The harsh edges are now masked out and won’t be affected by high contrasted black and white edging that plagued us before.
You can download his free sharpening action here and get more from Jimmy here.
Source: Shutter Evolve


